Saturday, January 5, 2008

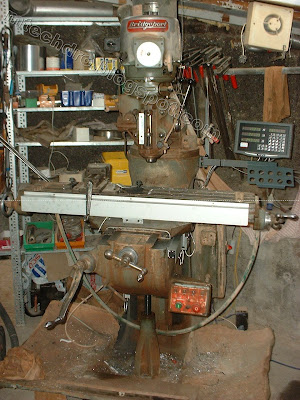
141- mTech DRO-3M on Birmingham Mill from Steve Henning (USA)

Thanks Steve for sharing with us his DRO installation on his Birmingham Milling machine. The mTECH DRO3M system is used to replace his Mitutoyo Digimatic DRO.


Steve:" The Y axis mounting brackets were part of the Mitutoyo Digimatic DRO that I replaced with the m-TECH 3 axis DRO. I attached the scale covers with silicon sealant (no screws) as my experience with this product is if you have a good fit, it will take a good amount of force to remove it."

Overall view of the X and Y axis.


Close-up view of the Y-axis.


Steve has a clever way to fine-tune the alignment for the Z axis, by mounting a bar.
Steve:" As you can see I elected to first install aluminum bars to attach the scales too. I like doing it this way as I can dial-in the bar and then simply mount the scale to it."


Steve has chosen to mount the Rubber side facing the work table. We will recommend to install the Z scale with the rubber side facing out, so that it will reduce the chances of flying chips and coolant "attacking" the scale.


Steve is really neat and attentive to details. He has coiled up and cable-tie the wires nicely.

Thank you for sharing.

Monday, December 31, 2007

158- mTech DRO-2M on YCM Milling (Bridgeport lookalike) from Horace (Taiwan)

Thanks Horace for sharing with us his DRO installation on his YCM Milling machine (a bridgeport lookalike).

It is an honour to sell to a Taiwan customer, as Taiwan is well-known for their machine tools export.

mTECH DRO-2M on his YCM Milling machine (made in Taiwan)


The Y axis scale installation.


The X axsi scale installation.


Thanks Horace for sharing with us.

134- mTech DRO-2L on Birmingham lathe from John Stanke (USA)

Thanks John for sharing with us his DRO installation on Birmingham lathe.

Photo of the whole setup.


Photo from behind, wires are too long and has recommend John to tied them up together with the DRO stand.


View from below showing the Z axis scale and reader head installation.


John has chosen to install the mTECH Scale in the front for the X axis.

Here is John explanation: "My Birmingham is different than the one shown in your blog. On the tailstock side of the carriage there are some things that get in the way. The cross slide lock down screw and the the carriage lock down screw. If I installed the scale on that side I would have to remove the screws. So I tried to install to the spindle side of the carriage. "


Thanks John for sharing with us.

Monday, November 26, 2007

103- mTech DRO-2M on Milling Machine from Charles Weyrauch (USA)

Thanks Charles for sharing with us his Milling with mTECH DRO installation.

Charles has chosen to install the mTECH Scale in the front for the X axis.
He has also made some clear plastic sheet to prevent splashing coolant.


This is a picture of the X axis with the cover installed.


Below shows the picture of the X and Y axis scales with their covers on.


Charles says" X axis install was pretty straight forward but the Y was interesting because there was no existing surface to mount the reader head on."

Here is how he managed to install them.

See the special bracket that is made to hold the reader head. Ingenious.


Charles : "The scales arrived last Tuesday and I finished the installation yesterday. Everything worked out perfectly, thank you for a very impressive product"

Thanks again Charles for sharing with us.

Wednesday, October 31, 2007

102- mTech DRO-3M on Bridgeport Milling Machine from David Ralston (UK)

Thanks David for sharing with us his Bridgeport Milling with mTECH DRO installation.


David has chosen to install the X axis Linear Scale on the front, he has a good reason:" The x axis is mounted on the front to save losing the 35mm on the y axis as you always need it. The locking screw on the x axis may have to be modified. Fitting to rear is much easier though"


David on his preference for a 3-axis DRO system :"The z axis is worth the extra money could be fitted neater but will do for now. may need extra guard to protect from coolant. "


Here is the photo of the Y axis. For this Y axis, most people will find it the toughest of the 3 axis.
But David thinks otherwise : " y axis straight forward. "


Installation is well done and Here he summarized his project :
"great to have it, very much needed and worth the money many thanks ."